All in One View
Content from Introduction
Last updated on 2026-06-16 | Edit this page
Estimated time: 10 minutes
Overview
Questions
- What is Yoda?
- What are best practices for research data management (RDM)?
Objectives
- Explain the importance of metadata and its relation to the dataset
About Yoda
Yoda is a piece of open source software that runs on top of iRODS, and it facilitates certain research data management (RDM) flows. The typical situation that you may encounter is that an IT department will offer a Yoda instance for your institution, which you can access through Yoda’s web interface.
As a brief summary of Yoda’s concepts, Yoda allows multiple users to cooperate for data management in so-called groups. A dataset consists of files brought together within a folder. It is at this folder level that you attach the metadata that belongs to that dataset. Once the dataset is ready for long-term storage, Yoda allows you to save a frozen version (snapshot) in the Vault area.
Research data management best practices
In terms of best RDM practices, metadata is of key importance. What is metadata and why is it so important?
A common definition of metadata is that these are “data about data”. A more precise definition is that metadata are structured data that deliberately describe characteristics of other data1. Metadata consists of information pieces that accompany the data itself, in order not only to describe the data but also to allow finding it back by means of searching through those bits of information. In that way, metadata is essential for finding data (back) and understanding it, and thus for scientific discovery and progress.
Researchers can gather data, add metadata, and then share it with others. Thus, years after the dataset has been put together, somebody else (or the future self of the original researcher) can find the data and reuse it, possibly, in novel research projects. According to RDM best practices, the metadata belongs to the dataset; it is an intrinsic part of it. Metadata is also essential for making data FAIR: good, machine-readable metadata helps to make datasets findable, accessible, interoperable and reusable.
To facilitate RDM best practices, Yoda facilitates the addition of machine-readable metadata to datasets through its web portal. Another RDM best practice facilitated by Yoda is the option to preserve a dataset by creating a secure and immutable copy of research data and the associated metadata in the Vault area. That version is then archived and cannot be changed anymore. To continue working, you can make a copy of it back to the research area in order to manipulate the copied data.
In the following tutorial we will be showcasing and exercising these flows, at times as though you were a researcher and data steward.
- Yoda allows multiple users to cooperate for data management
- Metadata is an intrinsic part of any dataset
- Yoda facilitates the management of datasets and metadata in a web portal
One can also distinguish different types of metadata such as descriptive, administrative, or structural metadata. In case you want to learn more about metadata, you can read this Metadata primer by Riley (2017) or follow the lesson Fundamentals of Scientific Metadata↩︎
Content from Connecting to the Yoda portal
Last updated on 2026-06-16 | Edit this page
Estimated time: 10 minutes
Overview
Questions
- How to connect to Yoda?
Objectives
- Enter the Yoda web portal and access the tutorial workspace
Introduction
Let us enter the Yoda web portal now.
-
Open a browser window. Navigate to the portal URL:
- For training hosted by SURF, the portal address is https://scuba-yoda.irods.surfsara.nl.
- For the addresses of institute-specific portals, see this overview of URLs.
- Before you can login, course instructors should give you access to the portal.
-
Log in with your credentials or SRAM by clicking on
Sign inand entering your email address. In your browser it should look something like this: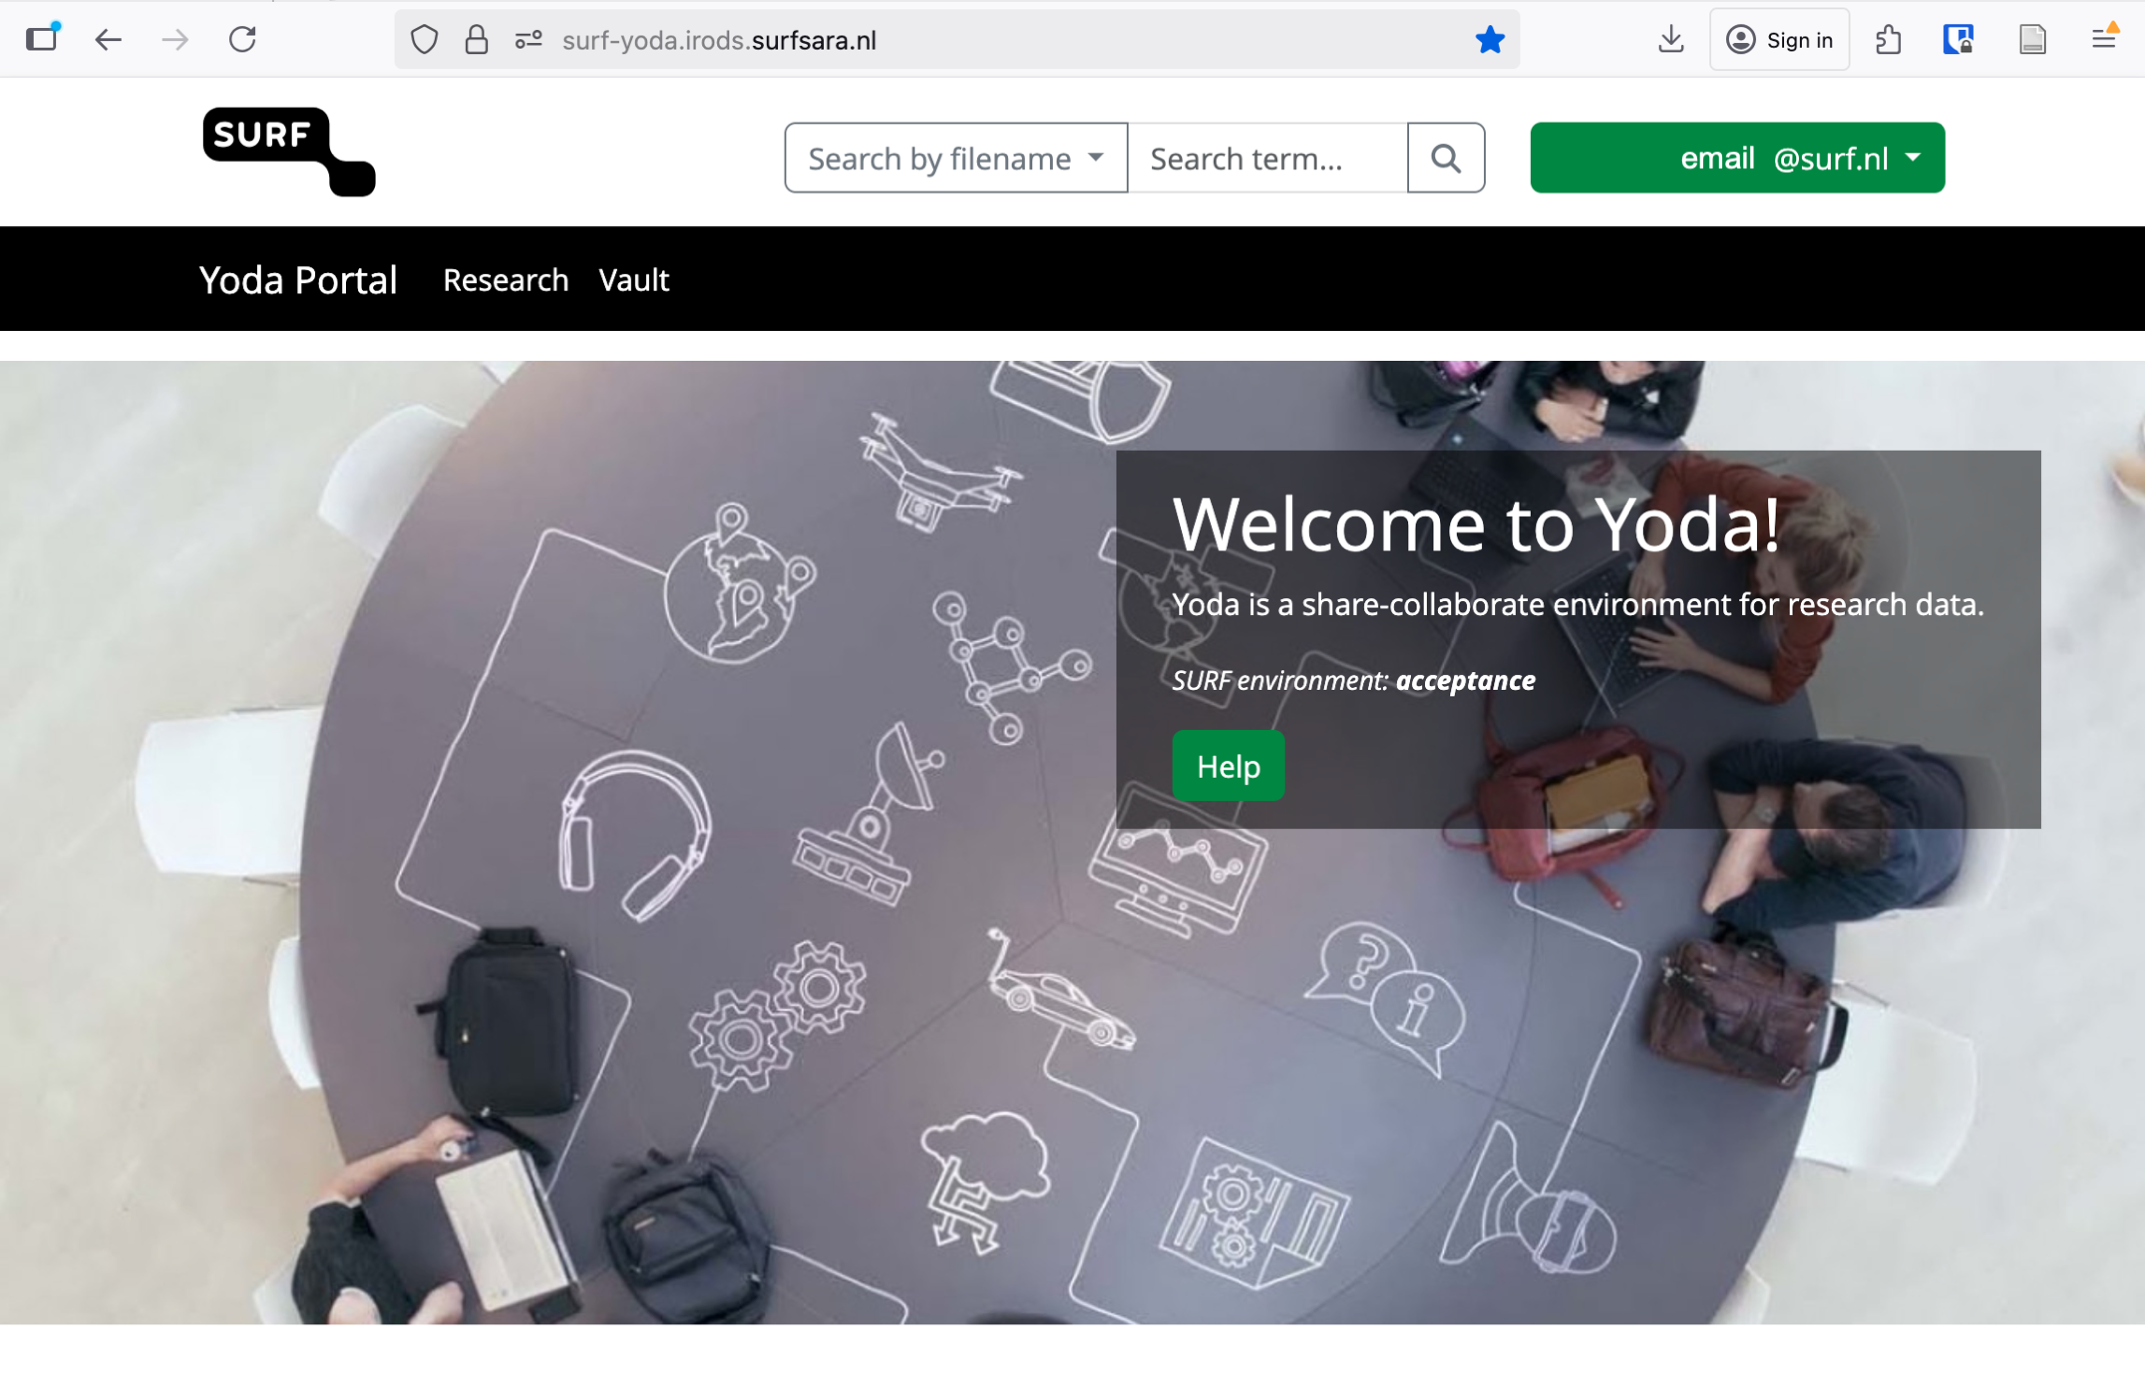 Example of how the Yoda portal looks once logged in
 Click on the Research tab. Verify that you see two folders:
research-tutorial-unsupandresearch-tutorial-sup. These two folders will represent two different groups that you will be working in. You have access to these groups and the Yoda portal because you were added as a member. You can only log in to Yoda when you are added to a specific group in Yoda.Try to remember that we will start working in the unsupervised group, and only in the last exercise we will move to the other one.
Make sure you invite workshop participants beforehand to a research group and provide a link to the correct portal address.
- Use your institutional email address to enter the portal
- You can only log in to Yoda when you are added to a specific group in Yoda
Content from Finding and reusing existing data
Last updated on 2026-06-16 | Edit this page
Estimated time: 40 minutes
Overview
Questions
- How do you find data in Yoda?
- How do you work with data and metadata in Yoda?
Objectives
- Demonstrate how to search for datasets in Yoda
- Show how to work with the data in a dataset
- Explain the difference between the Research area and the Vault area in Yoda
As an instructor, make sure you prepare a folder with a picture of the dress. It should be in the Vault area and workshop participants should have access to it. Also make sure that the words “Mondrian” or “Yves” are present in the metadata, but not in the file or folder names. You can use the folder published on GitHub to prepare the folder in Yoda. Make sure the dataset is in the Vault and removed from the Research area in Yoda.
Introduction
In this scenario we are going to pretend that you are a researcher who knows a dataset exists in the Vault of the Yoda instance you are working in. You only know some information about that dataset (i.e.: some metadata), but you know you want to use the data in the dataset.
By the end of the exercise you will know how to search for datasets in Yoda and work with the data in a dataset. You will also learn the difference between the Research area and the Vault area in Yoda.
For the exercises today, we will be alternating between the Research and the Vault tabs. The idea behind those two tabs is that there is one working area, separated from a frozen area.
The working area is where you perform all the usual data and metadata managing. Think of operations related to adding, removing, modifying or shuffling files around (for the data), and also analogous operations for the metadata. The frozen area is a place to make datasets unmodifiable, sort of snapshots if you will, so that they can be safely used by others.
In Yoda’s terms, the working area is the Research tab from the menu, and the frozen area is the Vault.
Preparing a working place in the Research space
When you log into the the portal of a Yoda instance (or Yoda server, or, from now on simply Yoda) you are confronted with a screen showing a menu bar at the top. That menu bar allows you to choose between, at least, two tabs; namely: Research and Vault.
We will pretend that you are working in a project of your own. You will therefore need to create a folder for that project. Since you want to work actively with a dataset for this exercise, you will now create that folder in the Research area.
Here are the steps you need to follow:
In the Yoda portal, click on the Research tab of the main menu.
You can see one folder or a list of folders. These are the groups that you are a member of. From the list of folders that appear, click on the
research-tutorial-unsupfolder.You will create a folder here to represent your project. Do so by clicking on the Create Folder button.
Give the new folder you are creating a name similar to “Project X”, where X should be something that you will be happy to work with, like: “Project Peter” or “Project Flamingos”. Please, remember what you choose, because the rest of the course attendants will be creating their own folders here too, so you may see a different list every time you look.
You are now set to go! This project folder will be the place where you will import the dataset that you are going to search for in the following section.
Searching for a dataset in the Vault
In Yoda you can search in the Vault for datasets that have been placed there by you or others within the groups of which you are a member. Yoda requires that you choose in which parts of a dataset you want to search, and the options it offers include:
search by file name
search by folder name
search by metadata
search by status
As explained at the beginning, you are pretending now to be a researcher in need for a dataset that you know exists in this Yoda instance. The information you have is little: it involves a picture of a famous Mondrian dress by Yves Saint Laurent. That is precisely what you need for your research! Let us find it now.
Challenge 1: search by filename
Can you find the file?
1. In the Research tab of the Yoda portal, see that there is a search box at the top
2. Type in the search box a word or words that you think are reasonable for the little information you have about the dataset, such as: “dress” or “Mondrian” or “Yves”
3. Hit “Enter” or click on the magnifying glass button to the right of the search box
The result is probably going to disappoint you: you will not find anything. By default, when you search this way, you exercise a “Search by file name” (see that “search by filename” is selected on the drop-down list to the left of the search box). Let us try a different search method in the next section.
Challenge 2: Search by folder
Can you find the folder?
1. To the left of the search box of the previous search, choose now “Search by folder”.
2. Type in the search box a word or words that you think are reasonable for the little information you have about the dataset, such as: “dress” or “Mondrian” or “Yves”
3. Hit “Enter” or click on the magnifying glass button to the right of the search box
The result is probably going to disappoint you this time as well: you will not find anything. Let us try yet a different search method.
Challenge 3: Search by metadata
Can you find the metadata?
1. To the left of the search box, choose now “Search by metadata”.
2. Type in the search box a word or words that you think are reasonable for the little information you have about the dataset, such as: “dress” or “Mondrian” or “Yves”
3. Hit “Enter” or click on the magnifying glass button to the right of the search box
Voilà! You should now have at least one result. However, how do you know what is the good one? You will have to bring it to your working area in order to inspect it.
🍝 🍔 🍜 Food for thought
What is the name of the root folder of the dataset? Is this folder in any way related to the name of any of the folders you can see in the Research area? How is it related?
Importing a dataset to the Research space
You are now going to import the dataset you found in the Vault, into the project folder that you created in the Resarch area a few steps ago. Remember? You called it Project <something>.
From the list of results of your search, click on the one that you want to work with (a hint: perhaps on the latest modified date, or after viewing the contents).
Note that you are now in the Vault tab from the main menu. That is because you are working with a dataset that was brought to the Vault as a way to “share it in an unmodifiable state”.
Challenge 4: inspect the metadata
Click on the Metadata button. Can you answer now some of the questions below? For example: can you explain why you were not able to find the data set when searching by name or by folder, but you were when you searched by metadata?
Questions:
What is the file name of the picture?
What is the folder name of the picture?
When was the picture taken?
Who took the picture?
Which location tag has been given to the picture?
What does the picture show (i.e., can you describe what the photograph has captured)?
Click on the “Close” button of the pop-up that is displaying the metadata. You should be seeing the folder contents again.
In order to import the dataset into your Project folder, click on the Actions button now. Then select the option that reads: “Copy datapackage to research space”.
-
A pop-up will appear displaying your groups:
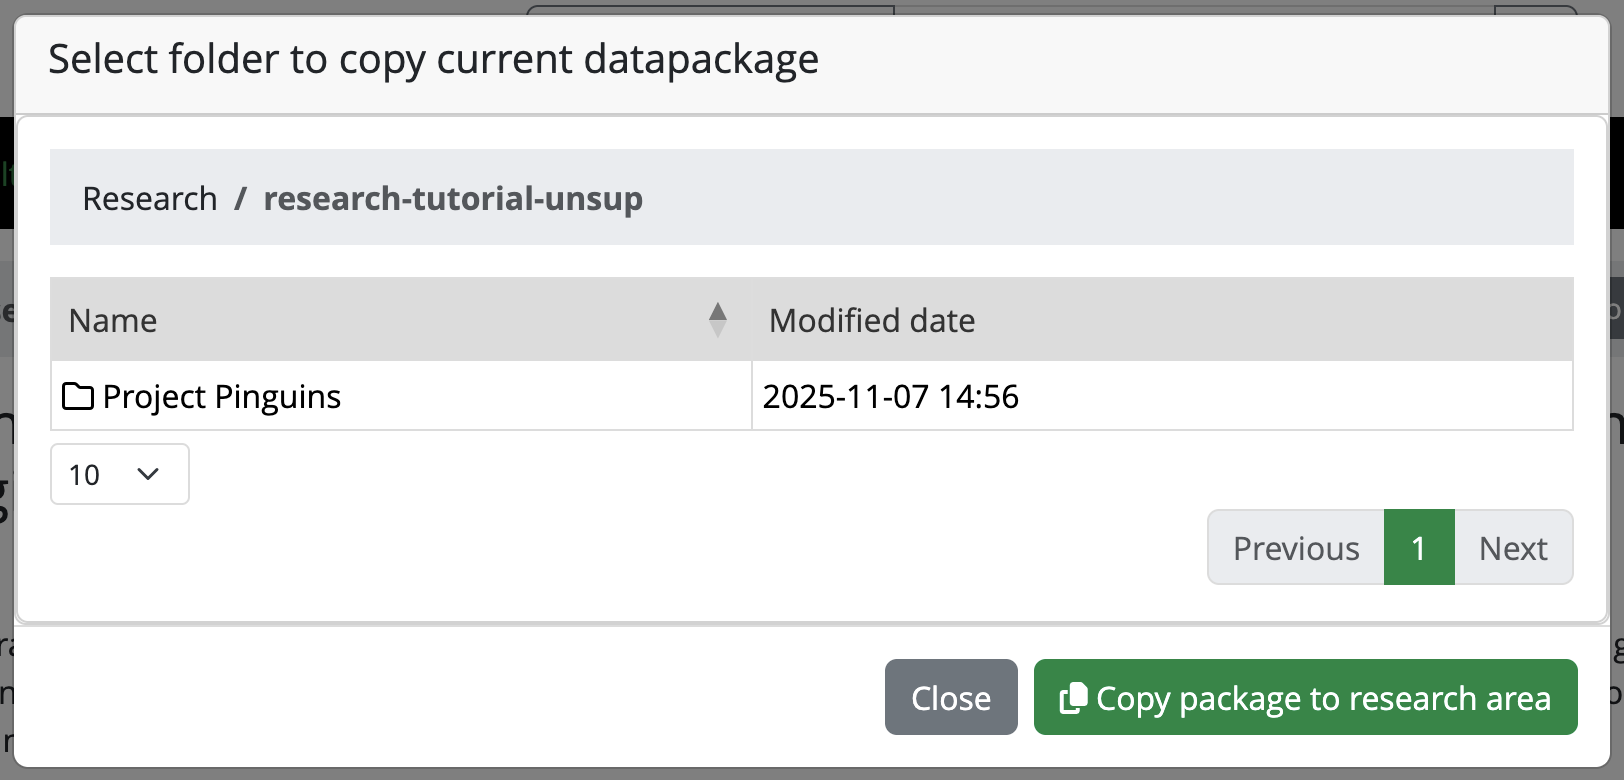 Picture of the pop-up for copying the datapackage to research space
Choose the
research-tutorial-unsupfolder. Then choose your Project folder within it. When you have selected your Project folder, click on the button “Copy package to research area”.
Working with the dataset
You have now found and imported a dataset from the Vault into your Project folder. Let us simulate that you reuse the data by looking at the picture!
In the Yoda portal, click on the Research tab from the main menu
Navigate to your Project folder by clicking the
research-tutorial-unsupfolder, and then click on your Project folder.You should now see a new folder in your Project folder, whose name includes a large number between square brackets. This number is a Unix epoch, which you can consider to be a timestamp indicating when you made a copy of the folder. This notation prevents unexpected overwrites when moving datasets around.
Click on the new folder name. You will see it has another folder within it called
original, and there is ayoda-metadata[epoch].jsonfile there as well. If you click the Metadata button, it will be empty. How come!?Well, look in the
originalfolder instead. Click, therefore, on theoriginalfolder. You should see a picture file and ayoda-metadata.jsonfile as well.Click on the Metadata button now that you are in the original folder. You should see a lot of metadata fields, and you can even modify them! This metadata should be the same you saw before you imported the dataset into your working area.
You can click on the “Close” button of the form to go back to the list of files.
In order to simulate using the data, you can now click on the name of the picture file. That will display the picture in a pop-up. Alternatively, you can click on Download to simulate that you save a dataset onto your laptop’s hard drive.
Lastly, click on the
yoda-metadata.jsonfile, which will preview the .json file in your browser. You can also open this .json file on your laptop with your favourite text editor. Can you identify any of the information there? Exactly! It is the same metadata as you see when you click on the Metadata button of the folder. Handy, right? This way you will always have the metadata along with the data, in a machine-readable format!
You have now completed this section. Feel free to move on to the next exercise at your own pace, but make sure you have answered the questions in the challenge above to verify that you have found the intended dataset.
- You can create folders and upload files in the Research area
- You can search for files, folders, and metadata for Groups that you have access to
- Copy a datapackage from Vault to Research space to continue working with it
- Look at the metadata to learn more about a dataset
Content from Unsupervised RDM cycle
Last updated on 2026-06-16 | Edit this page
Estimated time: 45 minutes
Overview
Questions
- How do you add metadata to your project in Yoda?
- How do you secure your data in Yoda Vault?
- How do you retrieve data from the Vault into Yoda’s Research area?
Objectives
- Demonstrate how to include useful metadata in Yoda
- Show how to upload data in Yoda
- Operate the cycle of securing, retrieving, and updating data independently in Yoda
Introduction
In this scenario we are going to pretend that you are a researcher who has been collecting data, and wants to freeze it in the Vault. You will be assuming the role of a seasoned data practitioner who will complete the process on their own, without any data steward’s supervision or intervention.
By the end of the exercise you will know how to advertise a dataset in Yoda’s Vault, taking care of the metadata and the data.
You can work with any dataset you may have already on your laptop, or you can pretend that you have one of your own by downloading something from the Internet. For example, you can use the Data portal from the Gemeente Amsterdam or one of the DANS Data Stations to search for data that may appeal to you (please verify the dataset’s license before you use it!).
In order to make it possible to walk through the unsupervised RDM cycle, make sure you prepare a Yoda Group within a Category where all workshop participants are part of the datamanager group.
Preparing another working place in the Research space
Remember that you have your own Project folder within the
research-tutorial-unsup folder in the Research space. You
may still have the folder with the data that you found in the previous
exercise. You will now be working with a different dataset, so you can
best create a working folder directly in your Project folder.
Please do so now. Give it a suitable name for the dataset you will be working with. We will refer to this new folder as the dataset folder during this exercise. In order to accomplish this you can follow analogous steps as those you followed during the previous exercise.
Filling in the metadata
The dataset’s metadata is crucial when you are working within RDM best practices. It will ensure that your dataset is reusable in the future (for others but also for your future self!). So you can best start with it, even before the data exists in Yoda. Let us tackle that right now.
In the Yoda interface, navigate to the
research-tutorial-unsupfolder, then your Project folder, and then to the dataset folder that you have prepared for this exercise.Once you are in the dataset folder, click on the Metadata button to start editing the metadata.
Now take all the time you need to think about what is reasonable metadata, and make sure you write plenty of it. Recall the feeling when you were searching for data in the previous exercise.
For inspiration, what would have helped you to be more effective in finding the dataset? Apply that now to facilitate that others will find your dataset both when they know it is there, and when they do not know it is there. This last case describes a data discovery scenario.
If you are working with a dataset which is published somewhere else (e.g., like the Gemeente Amsterdam or DANS), you can draw ideas from the metadata that you already actually see in that portal.
For datasets that involve spatial or temporal information, make sure you fill in appropriate intervals and location descriptors. You may look at the previous exercise’s dataset to see how you can include multiple location descriptors.
Think of the data policies from your research field or your institution. How could you use the form to add metadata that will fulfill those policies’ requirements?
Pay special attention to filling in a reasonable value for the Version field of the metadata. We recommend that you enter a number. Remember the value you enter.
-
Once you are ready, click on the Save button. If the form is still open, you may want to scroll all the way up and start going down slowly while you verify for error messages asking you to fill in mandatory fields.
 Example of missing information in a mandatory metadata field
 You can now see that there is a file in your folder called
yoda-metadata.json. That is where Yoda stores the metadata in a format that you can bring along as a companion to the actual data.If you have any colleagues in the course, now would be a good moment to ask them to verify your metadata and engage in a little discussion to see if what you have written is clear to others.
Uploading data
Now that you have the metadata, you can upload files with actual data from your laptop. For this exercise and simplicity’s sake, it will be enough to upload one or two files no larger than a few megabytes as though they are a full dataset; adding more would be overkill today.
In order to upload a file:
In the Yoda interface, navigate to the
research-tutorial-unsupfolder, then your Project folder, and then to the dataset folder that you have prepared for this exercise.-
Once you are in the dataset folder, click on the Upload button.
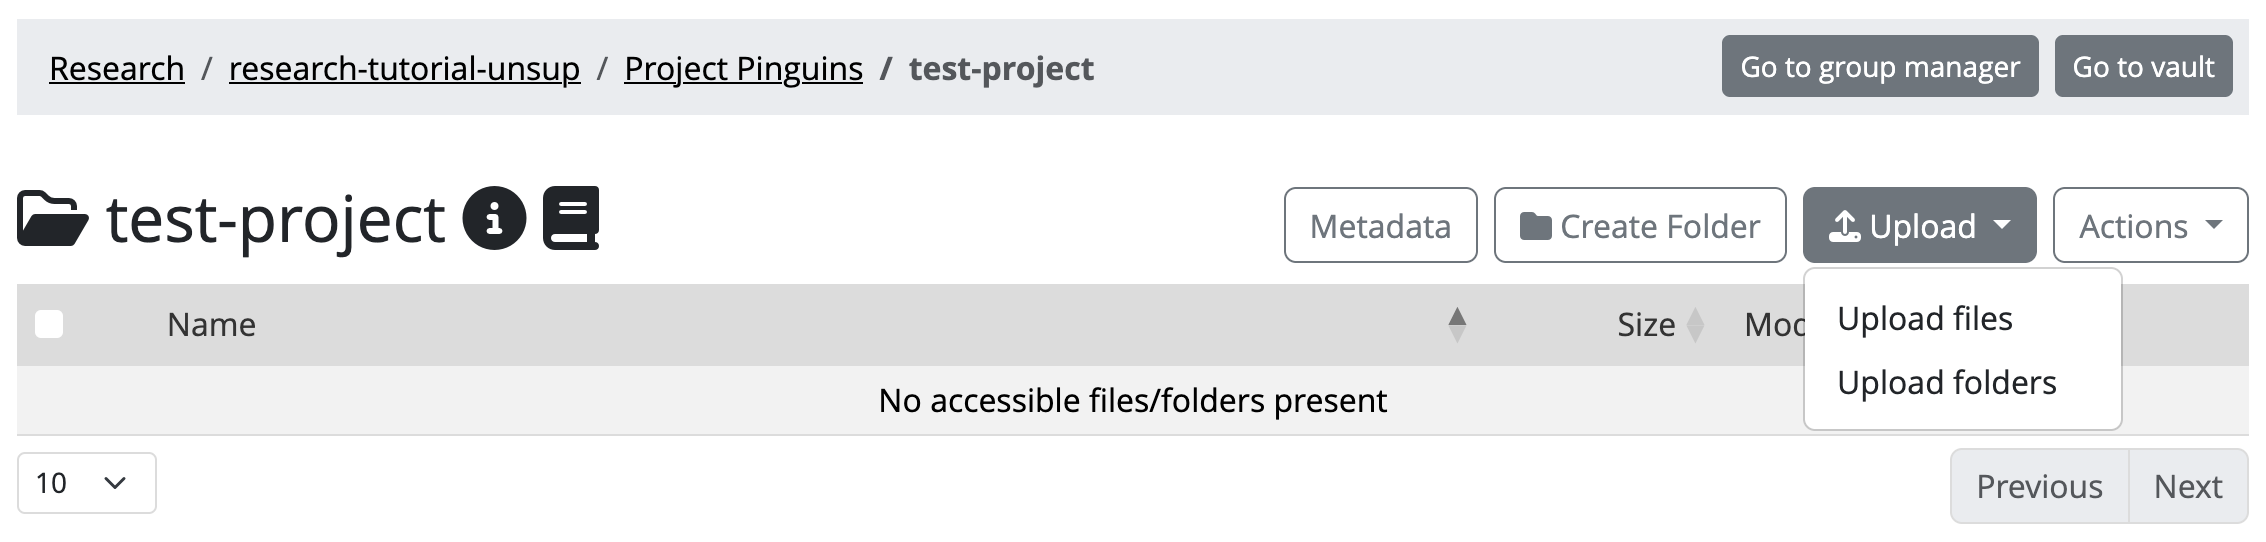 Yoda’s upload button
 Your browser’s file exploring dialog will pop up. You can navigate there through your laptop’s folders to locate the data files you want to upload. Locate those files.
-
Double click on the file you want to upload (you can also upload multiple files at once or an entire folder). Yoda will display a progress bar which will be filling up as the file uploads. When the upload is ready, you will see an OK.
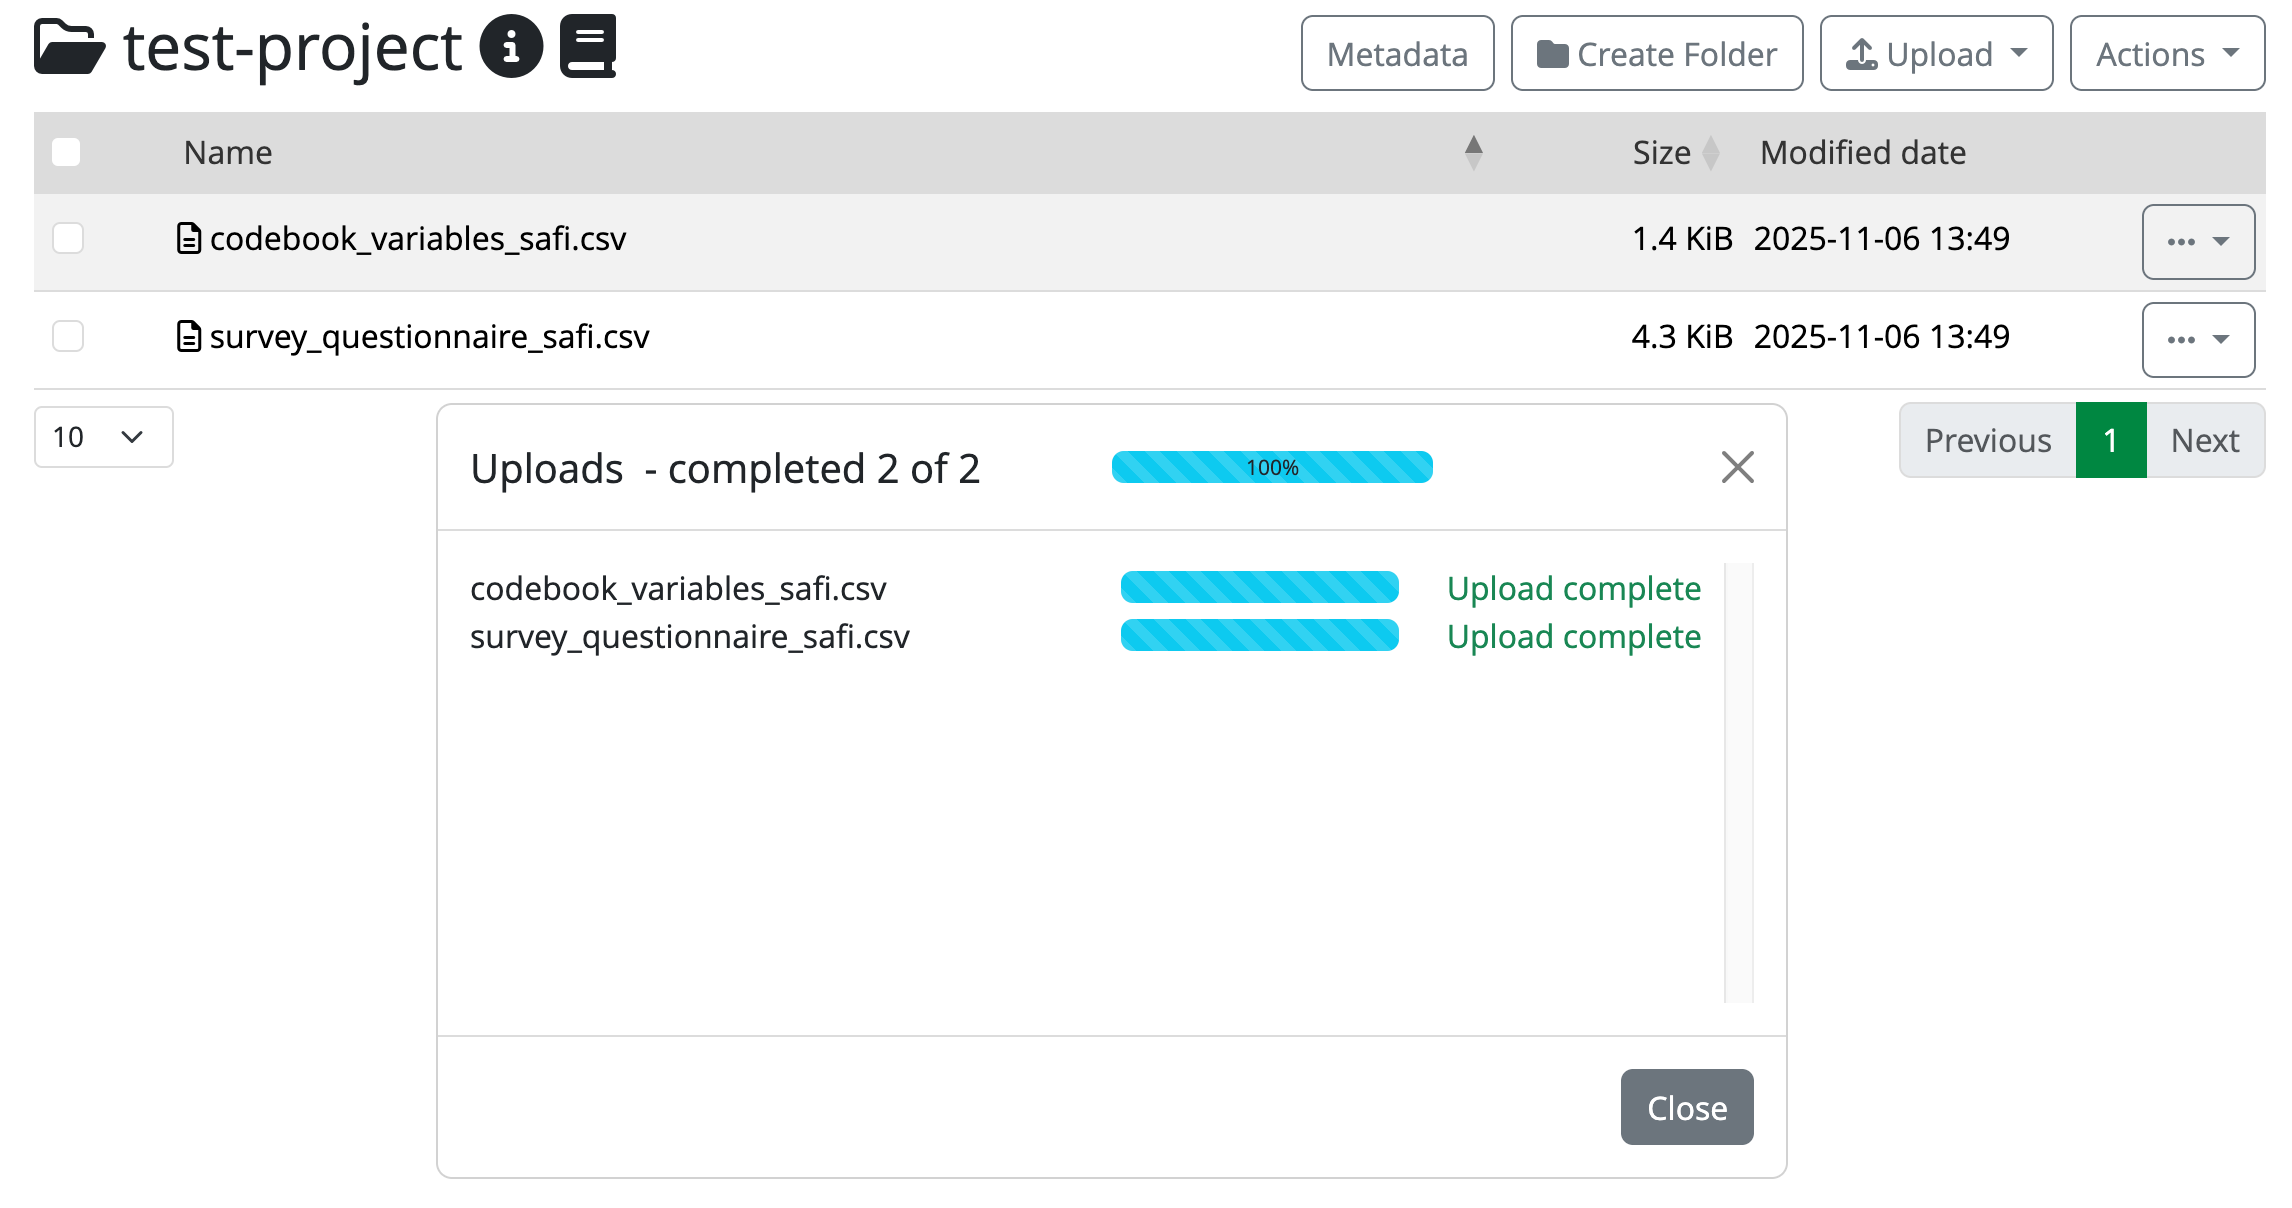 Completed uploads in the portal
 Close the progress bar dialog, and you will be back on your dataset folder. You should now see your file(s) listed there.
If you want to play with a multi-file dataset, you can repeat the upload process with more files.
Now you have made the files available to Yoda in the Research space. You are ready to freeze the dataset and make it available for others to use within this Yoda instance!
Submitting the dataset to the Vault
Now that you have a dataset which includes data and metadata, you can initiate the flow that will place the frozen version of the dataset in the Vault. This is going to be an unsupervised process during this exercise, simulating a situation where you are an expert data practitioner. This means that you are yourself in charge of not only submitting, but also accepting the dataset in the Vault.
In the Yoda interface, navigate to the
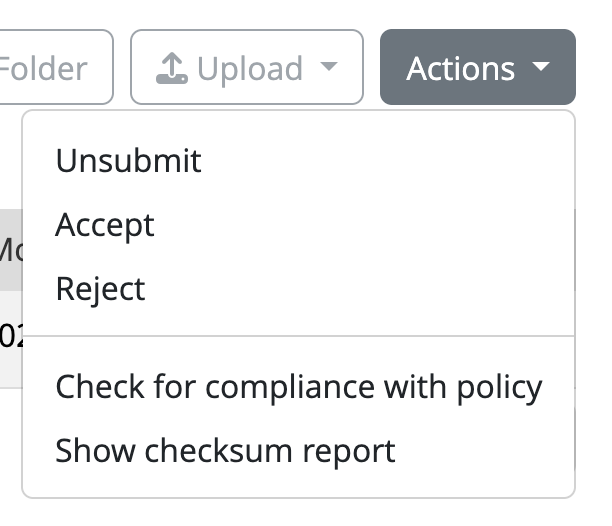
research-tutorial-unsupfolder, then your Project folder, and then to the dataset folder that you have prepared for this exercise.Once you are in the dataset folder, click on the Actions button, and select the Submit option.
-
After submitting, you will see that a green label appears next to the folder’s name title, indicating that the folder is submitted to the Vault. As you can see, you cannot make changes to the data or metadata anymore (unless you click the Unsubmit option on the Actions button).
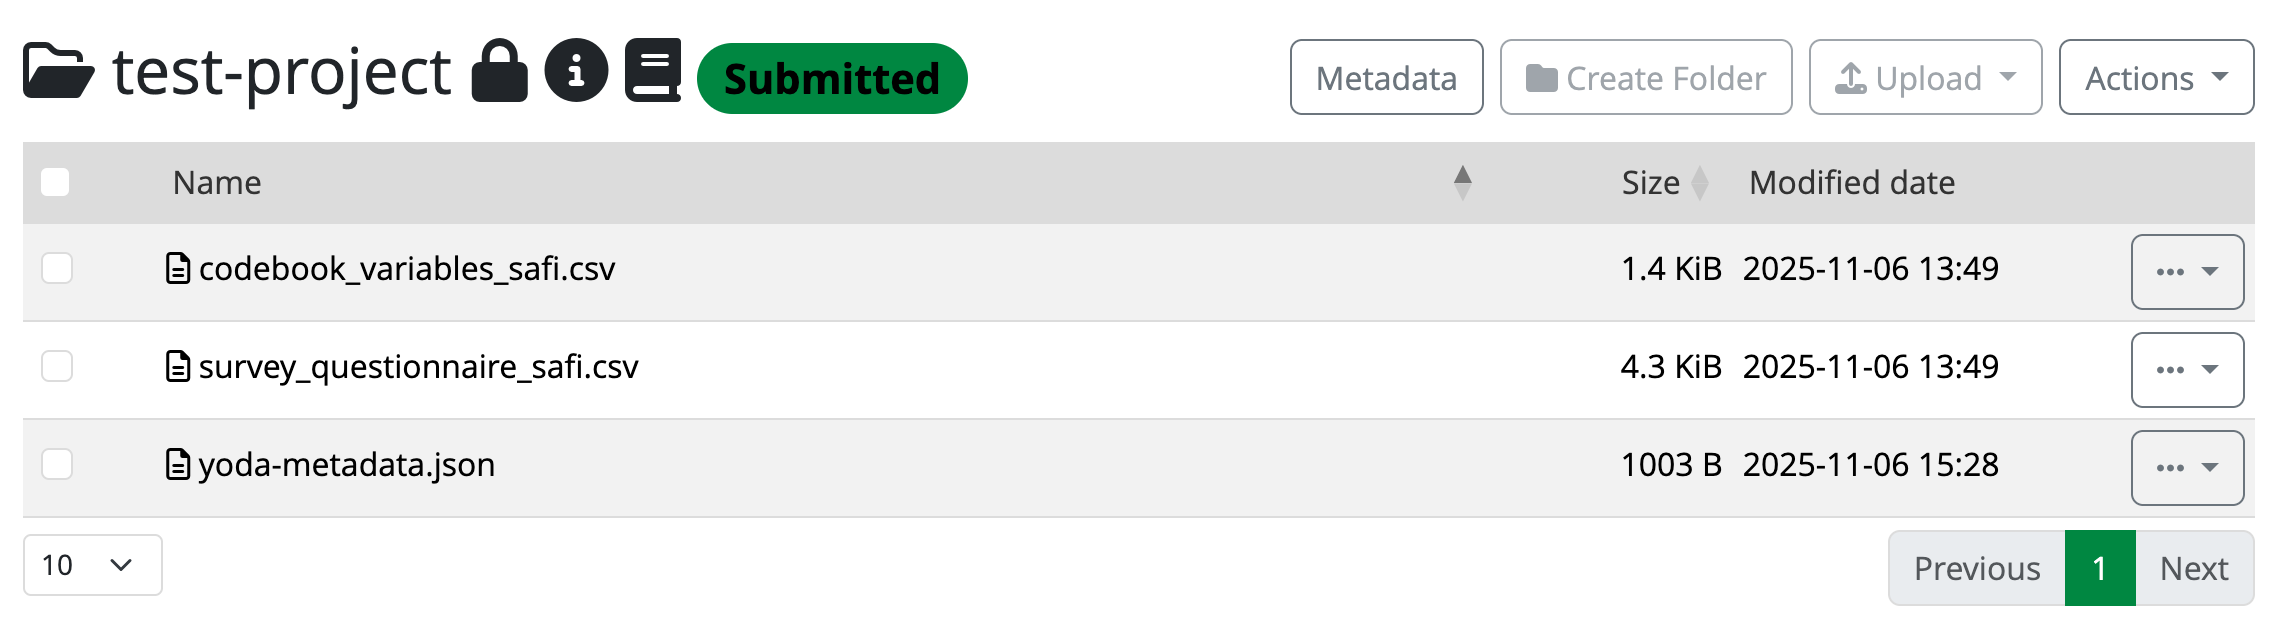 The datapackage is now submitted to the Vault
 Because you have datamanager rights in this category, you accept the submission to the Vault yourself. All you have to do is click on the Actions button, and select the Accept option.
After accepting, you will see that a new green label appears next to the folder’s name title. After a few minutes (depending on the file sizes and how busy the server may be), it will change from “Accepting” to “Accepted”.

Verify your dataset is in Vault
Now you must see your dataset listed including the [Unix epoch] in
the vault-tutorial-unsup folder. Verify that this is the
case.
Congratulations! You have just successfully placed a frozen version of your dataset in the Vault.
Deleting the working copy of the dataset
To simulate a real situation, you can now rely on the Vault to keep your dataset for you, so you can remove it from your working area. If you try to remove the dataset folder directly, Yoda may complain indicating that it is not empty. In that case, you will have to delete the files inside it first.
In the Yoda interface, in the Research tab, navigate to the
research-tutorial-unsupfolder, and then to your Project folder.Once you are in the Project folder, you can click on the three dots button to the right of the dataset folder that you have prepared for this exercise, and select Delete. Accept the verification step to delete the folder.
Done! The working copy of the dataset is now history. Long live the preserved dataset in the Vault!
Recovering the dataset from the vault
Now we are going to pretend that a year has passed since you last worked with your dataset. In the meantime you have decided you want to add a new file describing something related to the procedure, to the dataset (e.g., a README file). In your view, this is simply a version upgrade, so we should reuse the same original dataset. For that, you will need to make a working copy out of the version that you had stored in the Vault a year ago.
Bring now a copy of the dataset from the Vault to your Project
folder, following the same steps you applied during the previous exercise. You can
locate your dataset by searching for it, or by navigating to the Vault
tab, then the vault-tutorial-unsup folder, and scrolling
through the datasets that may be there.
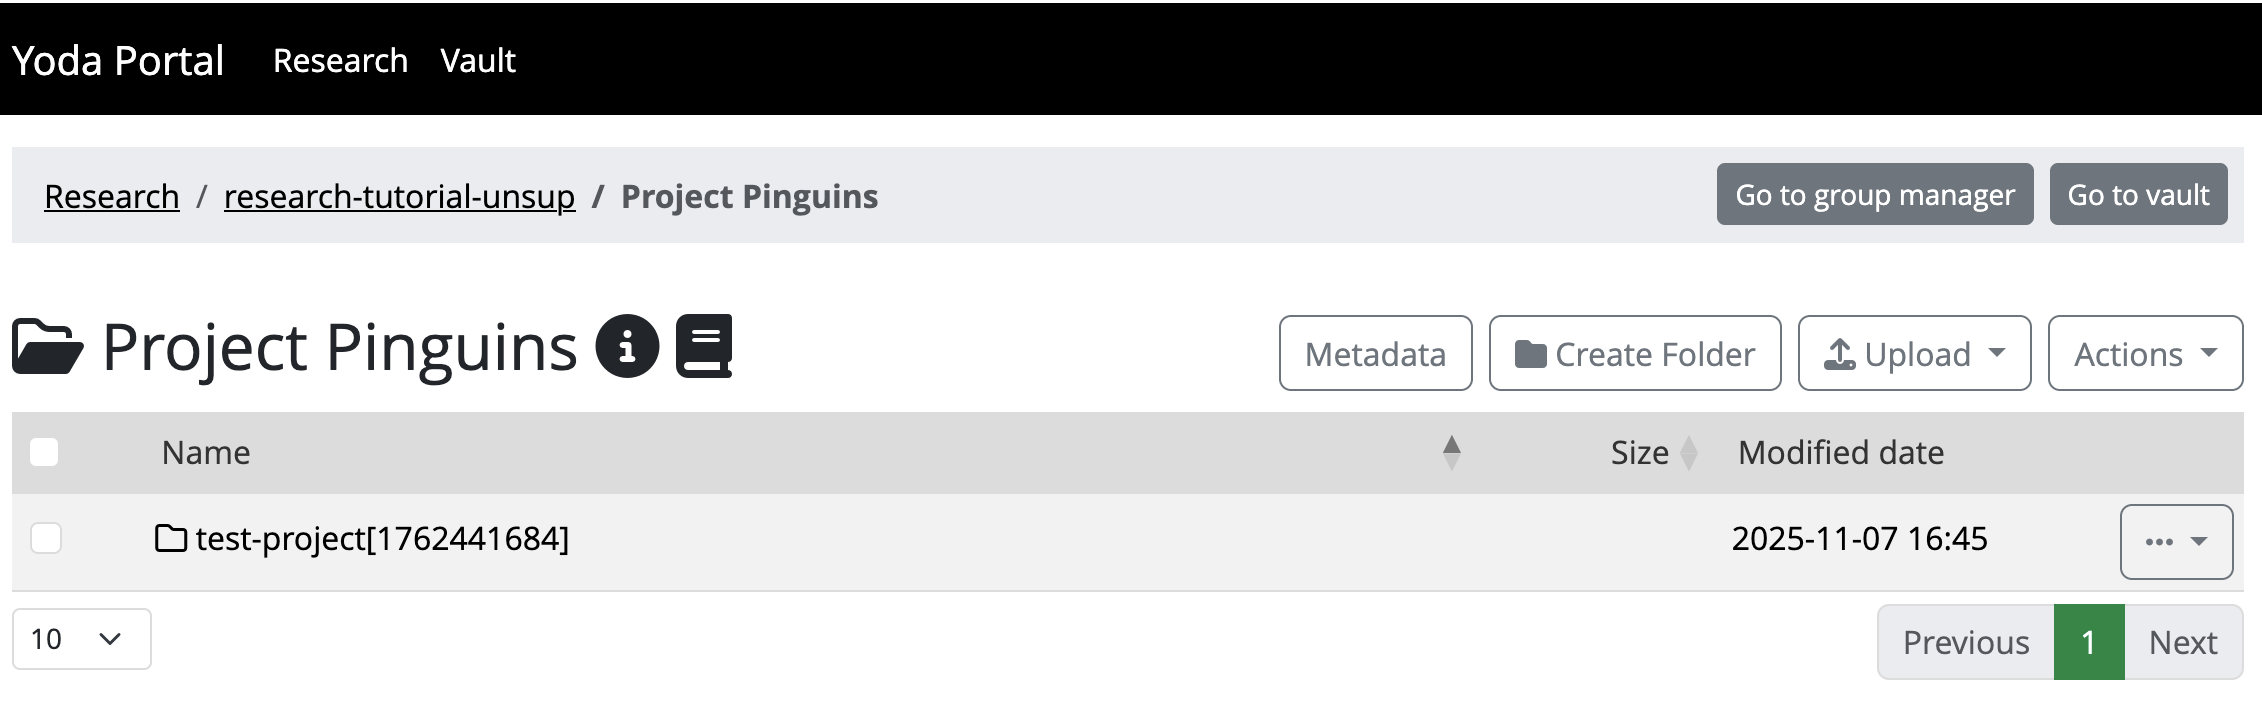
You will have completed this exercise once you can see a dataset folder within your Project folder in the Research area. This is how it could look:
Modifying the dataset as a new version
Navigate to the dataset folder within your Project folder in the
Research area. You will see that if you click the Metadata button the
metadata will be empty. Remember: you will have to navigate into the
folder called original. Then you can edit the metadata
(i.e.: the metadata will be there already). Increase the version number
now, and save the changes to the metadata.
Prepare a new README file on your laptop that you want to upload into
this dataset folder. Upload it now to the original
folder.
Submitting the new version to the Vault
As you can see you have had to work in the original
folder, but that is likely an unsuitable name for any worthy dataset.
The proper name will be that of the original dataset folder. Rename now
the original folder to that of the dataset folder (you will
need to step out of the original folder and use the three
dots button next to it to find the Rename option).
Now you can submit to the Vault this new version of your dataset.
You will have completed this exercise once you can see your two dataset folders named the same in the Vault (with different Unix epochs attached).
Food for thought
Well done! You have now completed this section. Feel free to move on to the next exercise at your own pace, but make sure you have answered the questions below to verify that you have understood the unsupervised flow to secure datasets in the Vault.
You must have realised by now that proper metadata management is key, but also very difficult to do properly. Yoda simplifies this effort a bit by allowing metadata to be added to folders only.
- Question: Can you think of situations where this approach will feel like a limitation, instead of a blessing? How would you tackle those, then?
Yoda also simplifies metadata management by allowing you to fill in a nice predefined form.
Could you think of a need for your institution to customise that form? Or maybe customise the form per research discipline?
Can you find something in the Yoda documentation that points to where this could be arranged? (hint: metadata schemas)
When you are defining metadata in the current form, you can probably see that there is a field for tags.
- What are these useful for?
What is in your own words a good definition for the Vault? What is it useful for?
- You can add metadata to your project in the Research area
- You can submit a dataset to the Vault to secure a frozen version of your dataset
- You can copy a datapackage from Vault to Research space to continue working with it
Content from Supervised RDM cycle
Last updated on 2026-06-16 | Edit this page
Estimated time: 50 minutes
Overview
Questions
- How do researchers and data stewards collaborate in Yoda?
Objectives
- Operate the cycle of securing data supervised by a data steward in Yoda
- Demonstrate how to check metadata and approve submissions to Yoda Vault
In order to make it possible to walk through the supervised RDM cycle, make sure you prepare a Yoda Group within a Category where you can add specific participants who will act as data steward to the datamanager group.
Introduction
In this scenario we are going to recreate the same steps as in the previous exercise, but you will be working in a group that requires that a data steward approves your dataset before it is allowed to reach the Vault. You will get the chance to be the researcher, but also the data steward.
At the end of the exercise you will know how the interaction between a researcher and a data steward can lead to a dataset being placed in Yoda’s Vault.
Preparing another working place in the Research space
Follow the steps from previous two scenarios to create a new Project
folder and a new dataset folder in the Research space, but take care to
use the folder called research-tutorial-sup this time.
Filling the metadata and uploading data
Follow the steps from the previous scenario to provide metadata for the dataset folder.
Follow the steps from the previous scenario to upload data to the dataset folder.
Submitting the dataset to the Vault
Now that you have a dataset which includes both data and metadata, you can again initiate the flow that will place a frozen version of the dataset in the Vault. This is going to be a supervised process, simulating a situation where you are collaborating with a data manager or data steward. This means that the dataset will not reach the Vault directly, but have to be accepted by a data manager.
Act as a data steward
Please get in touch now with the facilitators. They will give you instructions on how to work (possibly, together with a fellow participant) in order to simulate that you interact with a data steward to:
get your dataset to the Accepted status, as expected, and
exercise your data steward role
In short, the steps that the person with the data steward role will have to fulfill are:
Open the submitted folder from a classmate
Find out the submitter’s e-mail address by looking at the provenance information of the submitted folder
Send them an e-mail requiring a specific piece of metadata
-
Reject the submission
 Click the Action button in the Research area to accept or reject the submission
 Wait for the submitter to send the submission again
Verify that you now have the expected metadata
Approve the submission
Verify your dataset is in Vault
After you exchange interactions with the data steward and you get
their approval, you must see your dataset listed including the [Unix
epoch] in the vault-tutorial-sup folder. Verify that this
is the case.
Congratulations! You have just successfully placed a frozen version of your dataset in the Vault, approved by a data steward.
🍝 🍔 🍜 Food for thought
Now that you have experienced both the unsupervised and the supervised flows, can you see when you would apply each in your institute?
Who would be suitable candidates to be carrying out the task of data steward for the sake of approving?
How is that scalable to cope with all the research data in your institute?
How would you organise Research spaces in your institution’s Yoda? Why? Can you think of an alternative organisation of Research spaces?
- You can submit a dataset to the Vault to secure a frozen version of your dataset
- As a data steward, you can check the metadata and reject or approve submissions
Content from Archiving and publishing your data
Last updated on 2026-06-16 | Edit this page
Estimated time: 50 minutes
Overview
Questions
- How do you archive data from the Vault on SURF Data Archive (tape)?
- How do you publish data using Yoda’s publishing module?
Objectives
- Demonstrate how to archive data in the Vault on SURF Data Archive
- Demonstrate how to publish data in the Vault using Yoda
Note that the Yoda instance that you are working on needs the connection to SURF Data Archive for the first part, and for the second part the publication module needs to be enabled.
Introduction
Once data is secured in the Vault, there are two useful additional steps that can be taken. The first is that data in the Vault can be archived in the SURF Data Archive, where you store your data for a longer period of time. It is not a backup system, but intended for storing data you are not actively using. Note that not all Yoda instances are connected to the Data Archive, but in principal they could be. For training hosted by SURF, the Data Archive is connected to the SURF Yoda portal and you can archive data on tape.
The second option is to publish the dataset on the web. Your dataset will get a digital object identifier (DOI) assigned, and the metadata of the data package will be published in data catalogues. If the Access Type metadata field is set to ‘Open - Freely retrievable’, the data will be published as well and be available for download. In order to be readily available for download from the web, data must be on hot storage. So avoid the archiving of data that is published open access.
Archive your data on tape
Now that you have a dataset secured in the Vault, it is quite likely that you do not need to work with the data for some time. In that case, it is a good idea to move the data to the SURF Data Archive, a tape-based storage system that is designed for secure, energy-efficient, long-term storage. Your data is still available to you if needed, and it is only accessible to the members of your Yoda group. But since the data will be stored offline on tapes, you will not be able to access the data directly anymore in the Vault. In case you need to work with the data again, you first need to unarchive it. Depending on the size of the dataset, this might take some time.
Submit your data to the archive
Only data secured in the Vault can be archived on tape. To archive your dataset in the Vault, you need to do the following:
- Navigate to the
vault-folder and click on your Vault submission. There you can find the Actions button again, and you click on Archive on tape:
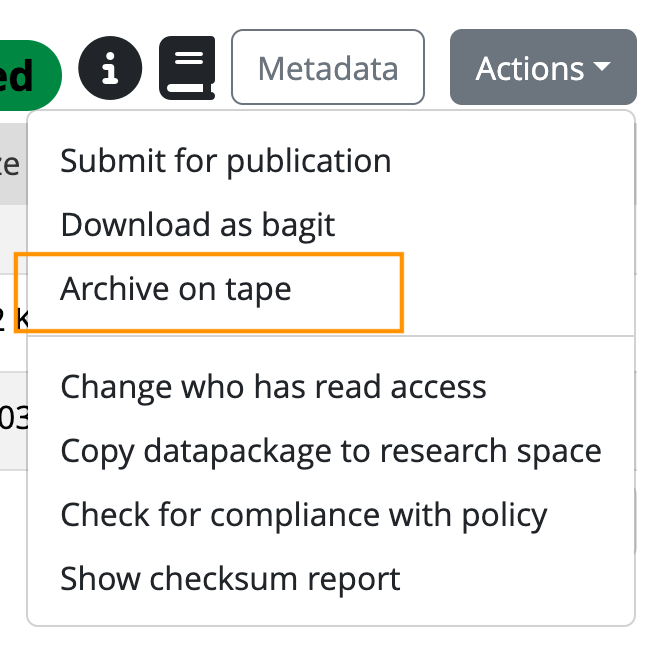
- You will be asked to confirm that you agree to archive the datapackage to tape, because data will not be directly accessible after archiving. If you confirm, the archive action will be scheduled and some time later your dataset will be stored on tape.
The scheduler will now schedule the archiving of your dataset. The tape robot will write it to tape and put it in the library. Watch it in action now:
Submitting the dataset for publication
Now that you have a dataset which includes both data and metadata in the Vault, you can also choose to publish this package. That is a great way to share your data with the world, allowing others to re-use it. In the Yoda metadata, you already provided information about the access conditions and license of the data. This is important to revisit before you actually publish the data. If you chose data to be open and freely retrievable under ‘Data package access’, the data will become publicly available after publication. In case you chose for restricted or closed access, only the metadata will be published. In case of open data, a suitable license should have been selected to make clear how the data can be re-used and attributed.
Submit your data for publication
Only data secured in the Vault, can be published on Yoda. To publish your dataset in the Vault, you need to do the following:
- Navigate to the
vault-folder and click on your Vault submission. There you can find the Actions button again, and you click on Submit for publication:
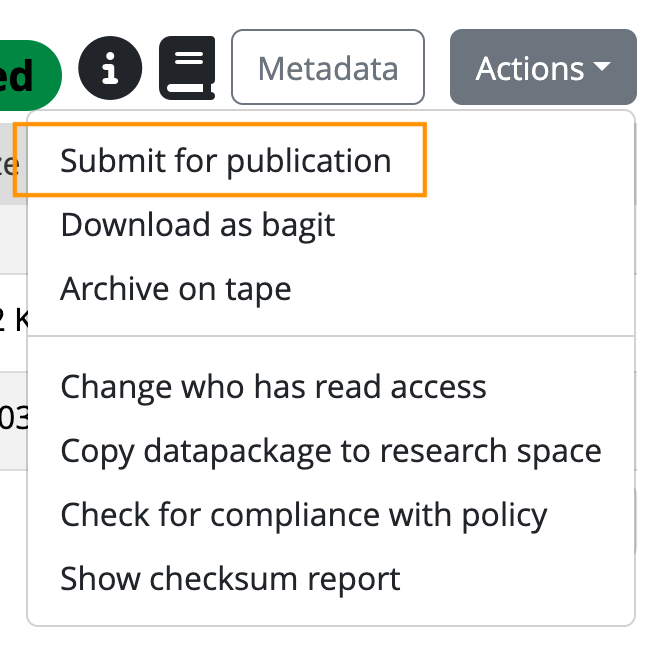
You will be asked to confirm that you agree with the terms and conditions for publication.
If you confirm, the data manager will will receive a notification and will evaluate the data package on criteria like the structure and documentation, compliance with policies and regulations, and completeness of the metadata.
After this review, the data manager will either approve the publication, or ask you to make some additional changes to make the data package more FAIR. Once approved, your dataset will be published in Yoda (and the metadata in DataCite as well).
When the data package has been published, the following will happen:
- A public landing page will be created for the data package with all the Yoda metadata. The metadata will also be registered in DataCite, which allows the data package to be easily findable for others on the internet.
- A Digital Object Identifier (DOI) will be assigned to the data package. You can use the DOI to cite the data package, for example in your manuscript, or to promote it via social media. You can find the DOI by clicking the “i” icon in the Yoda vault once the data package is published.
Here are some examples of datasets published on different Yoda publication platforms:
- From the Vault, you can submit a dataset to the SURF Data Archive to store it on tape
- From the Vault, you can submit a dataset to be published to share it on the web
Content from Epilogue
Last updated on 2026-06-16 | Edit this page
Estimated time: 5 minutes
Well done! You have now finished the exercises for today. You can be proud of having completed some tough work today.
If you think anything is still unclear, do not hesitate to contact your facilitators.
For next steps with regards to Yoda, you can visit our documentation pages here: Yoda Hosting.
Thank you for your attention, and we hope to have been of help for you today.
Complimentary information
A handy alternative interface to the YODA portal of a YODA instance is the WebDAV interface: https://surf-data.irods.surfsara.nl (you can also use WebDAV to get access to Yoda through your local file manager, by mapping it as a network disk).
Yoda is open source, and you can view their code and advanced documentation in Utrecht University’s GitHub: https://github.com/UtrechtUniversity/yoda